Craft Your Reflection: Build Your Own Smart Mirror!
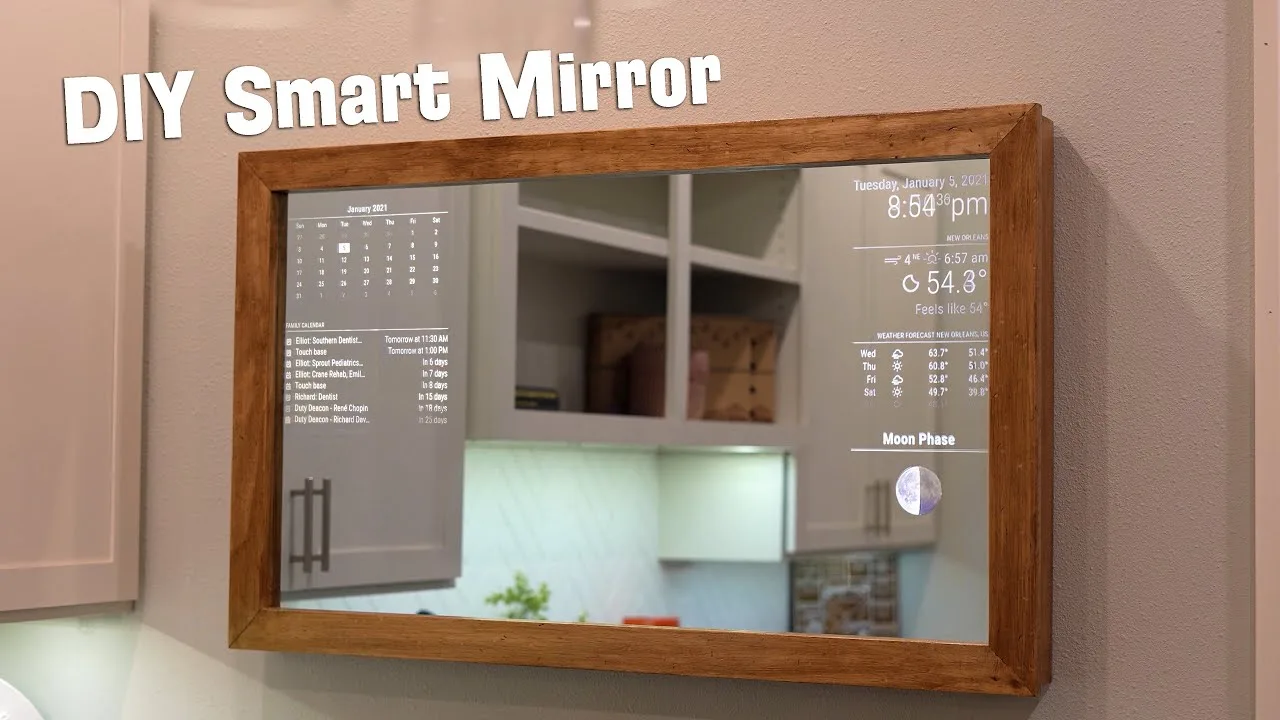
Imagine: a mirror that displays your calendar, weather forecast, news headlines, and even compliments you on your outfit. Sounds futuristic, right? But with a little DIY magic, you can build your own smart mirror at home!
This guide will equip you with the knowledge and steps to create this personalized reflection, transforming your mirror into a functional and stylish tech marvel. So, grab your tools and let’s get started!
1. Gather Your Supplies: Hardware Essentials
Building your smart mirror requires some key components:
- Mirror: Choose a two-way mirror, allowing you to see through while displaying content on the back.
- Display: A monitor or TV screen of suitable size to fit behind the mirror.
- Raspberry Pi: This tiny computer acts as the brains of your mirror.
- MicroSD card: Stores the operating system and software for your mirror.
- Power supply: To power both the Raspberry Pi and the display.
- HDMI cable: Connects the Raspberry Pi to the display.
- Optional: Speakers, microphone, camera, and frame materials for customization.
Remember, these are just the basics. You can personalize your smart mirror with additional features depending on your interests and skills.
2. Assemble Your Mirror: Putting It Together
With your supplies ready, it’s time to assemble! Here’s a general outline:
- Mount the display: Securely mount your monitor/TV behind the two-way mirror. Ensure the display doesn’t show through the mirror’s reflective surface.
- Set up the Raspberry Pi: Install the operating system (like Magic Mirror) and connect it to the display and power supply.
- Customize your mirror: Choose modules and widgets to display the information you want, like weather, news, or social media updates.
- Connect and test: Power on your smart mirror and test all functionalities.
Remember, detailed instructions and variations exist based on your chosen components and desired features. Consult online tutorials and communities for specific guidance.
3. Unleash Your Creativity: Personalization Power
The beauty of building your own smart mirror lies in its customization potential. Here are some ideas to spark your creativity:
- Add voice control: Integrate voice assistants like Google Assistant or Amazon Alexa for hands-free interaction.
- Display interactive elements: Include weather animations, news tickers, or even personalized messages.
- Incorporate sensors: Add motion sensors for automatic display activation or temperature sensors for weather updates.
- Design your frame: Choose wood, metal, or even recycled materials to create a unique and stylish frame.
Remember, the possibilities are endless! Let your imagination guide you and explore online resources for inspiration and tutorials.
4. Reflecting on Your Success: Enjoy Your Smart Mirror!
Congratulations! You’ve built your own smart mirror – a testament to your tech skills and creative vision. Now, step back and admire your handiwork as you enjoy the convenience and personalized information it offers. Remember to keep exploring and updating your mirror as your needs and preferences evolve.
So, are you ready to embark on this exciting DIY project? With a little planning and effort, you can create a smart mirror that reflects your personality and tech-savvy spirit. Remember, the journey is just as rewarding as the final product, so have fun and enjoy the process!